Laravel クエリの切り出し、ローカルスコープ
クエリの切り出し
コントローラでの記述を無くし、ファットコントローラを防ぐ為、モデルに共通クエリ制約(ローカルスコープ)の定義する。 readouble.com
ローカルスコープ
お作法として、メソッドの頭にscopeとつけて引数に$queryとし、戻り値に$queryと書く必要がある。
※スコープの中では->getや->pagenateなどは書かない。そこでクエリ処理がが止まる為
コントローラーで使う場合はメソッド名のscopeを外した名前を書く。
モデル
<?php
public function scopeAvailableItems($query)
    {
//t_stocksテーブルのproduct_idをグループ化して、Havingでquantityを結合
        $stocks = DB::table('t_stocks')
//Laravelの場合、select内でsumを使うため クエリビルダのDB::rawで対応する
        ->select('product_id', DB::raw('sum(quantity) as quantity'))
        ->groupBy('product_id')
        ->having('quantity', '>', 1);
        return $query

        ->joinSub($stocks, 'stock', function($join){
//さらにproductとshopテーブルをjoinで結合
        $join->on('products.id', '=', 'stock.product_id'); })

//shopsテーブルのidとproductsテーブルのproduct_idを結合
        ->join('shops', 'products.shop_id', '=', 'shops.id')
        ->join('secondary_categories', 'products.secondary_category_id', '=', 'secondary_categories.id')

//imagesテーブルのidとproductsテーブルのimage1を結合
        ->join('images as image1', 'products.image1', '=', 'image1.id')

//shopsとproductsのis_sellingがtrueならgetする
        ->where('shops.is_selling', true)
        ->where('products.is_selling', true)

//複数のテーブルを紐付ける為、同じ列名が存在するのでテーブル名.列名 as 名前のように指定する。
        ->select('products.id as id', 'products.name as name', 'products.price' ,'products.sort_order as sort_order',
        'products.information', 'secondary_categories.name as category' ,'image1.filename as filename');
    }
- WHERE・・・「GROUP BY」の影響の前に条件が適応
- HAVING・・・「GORUP BY」の影響のあとに条件が適応
コントローラー
<?php
public function index()
    {
        $products = Product::availableItems()->get();
        return view('user.index', compact('products'));
    }
Laravel Socialite OAuth認証の実装(Googleログイン)
実行環境
- mysql5.7
- phpmyadmin
- Laravel Framework 8.83.26
- PHP Version 8.1.13
- Apache/2.4.54 (Debian)
socialiteを使用し、OAuth認証を実装
OAuthとは
OAuth (オー オース) は、権限の認可(authorization)を行うためのプロトコル。
認可のためのプロトコルであり、認証で使うとセキュリティ上リスクがある。
※認証と認可の違い↓
dev.classmethod.jp
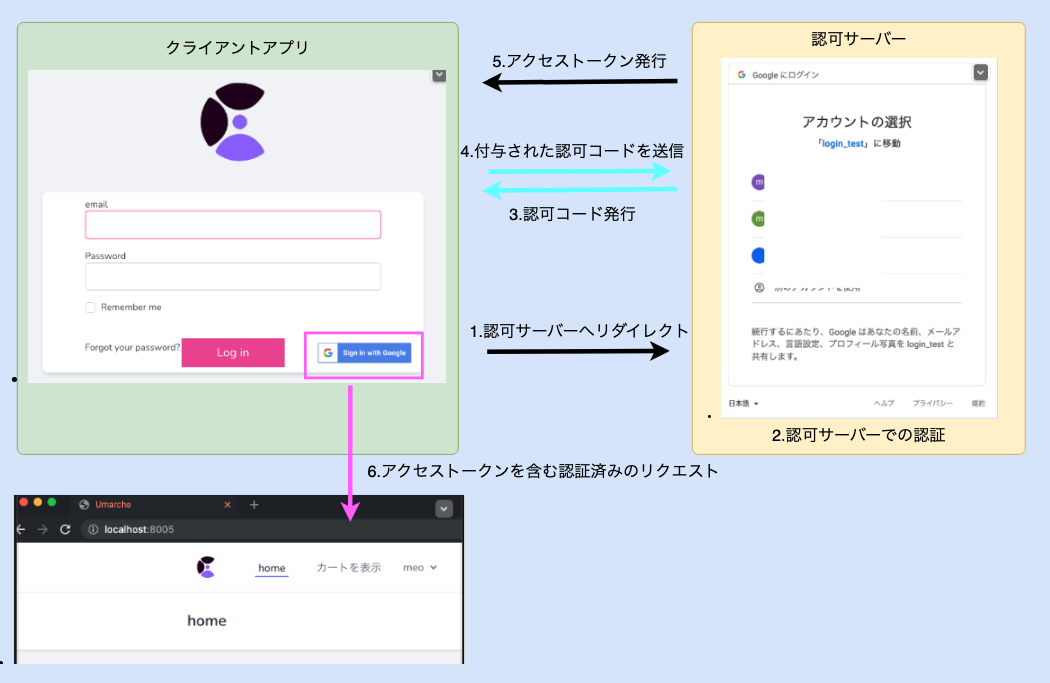
認証サーバーへリダイレクト
Googleと連携したい時に、クライアントから認証情報を付与して、Googleの認可サーバーへのリダイレクトさせる。
'client_id' => env('GOOGLE_KEY'),
'client_secret' => env('GOOGLE_SECRET'),
'redirect' => env('GOOGLE_REDIRECT_URI'),認可サーバーでの認証
ユーザーは認証サーバーに対してgoogleアカウントで認証を行い、クライアントアプリから求められているアクセスを許可する。認証コード発行
アクセスが許可されると、アクセストークンを発行するための認可コードを発行して、クライアントアプリへ再びリダイレクトされる。付与された認可コードを送信
リダイレクト時に付与された認証コードをクライアントアプリは認証サーバーに送信する。
APIキー発行手順
新規プロジェクト作成
Google Cloud Platformへログインをして、新しプロジェクトを作成する。 console.cloud.google.com
プロジェクト名を入力し作成

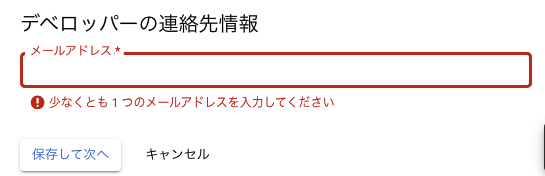
OAuth同意設定
外部ユーザーがログインするので外部を選択し作成。

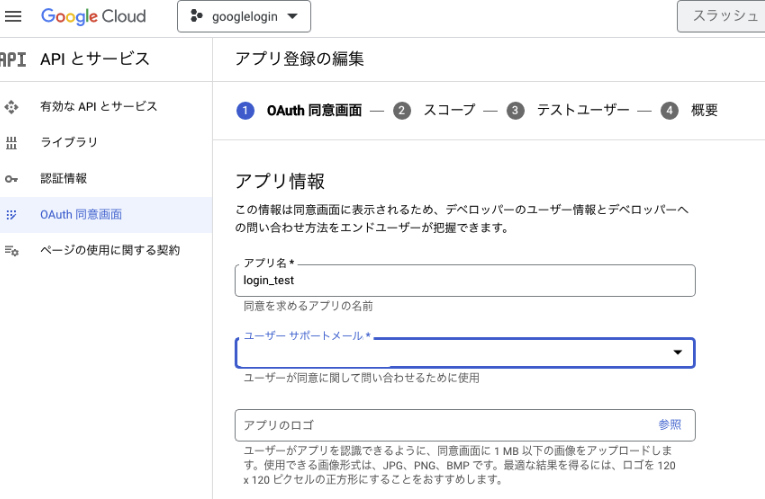
googleログイン ではスコープ・テストユーザー不要

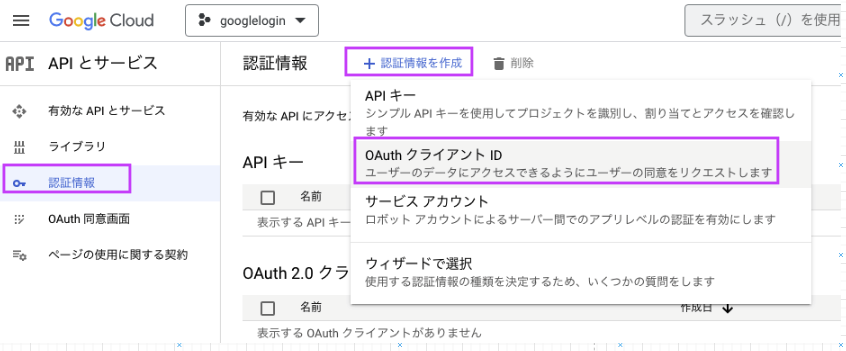
認証情報の発行
OAuth クライアントIDを選択
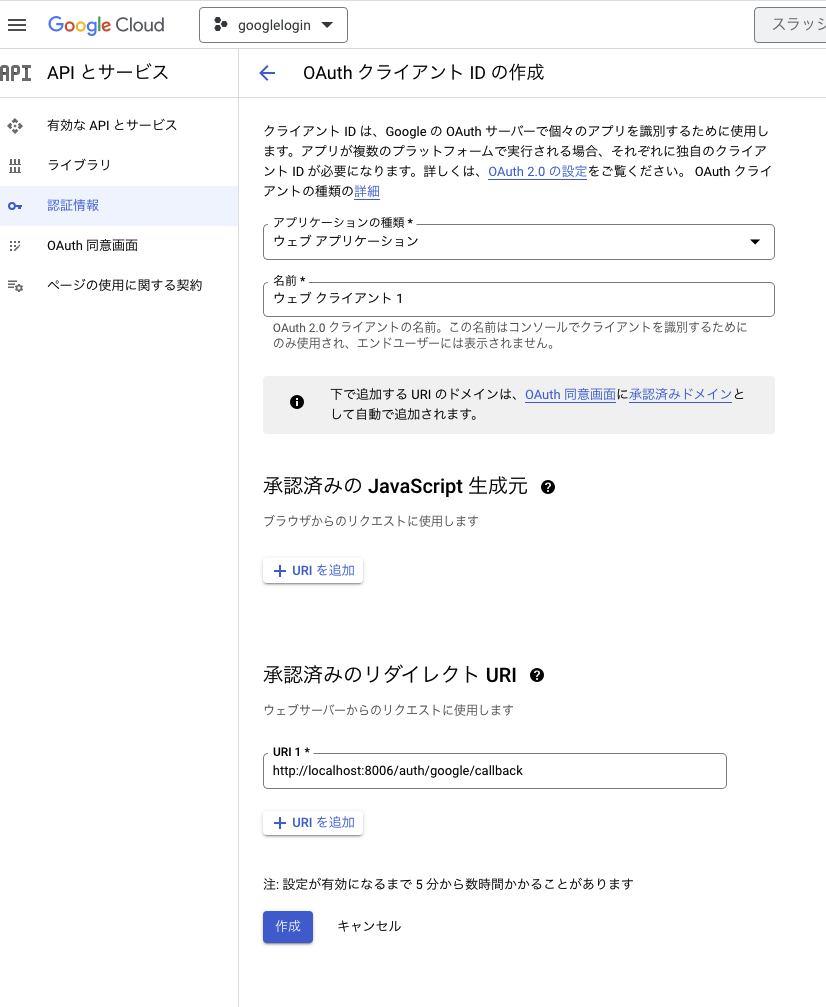
OAuth認証発行用事項入力
- 名前 ー 管理画面で識別するための名前なので任意の文字列でOK
- 承認済リダイレクトURL ー callback URLを入力。.envで設定したのと同じもの
APIキーの発行

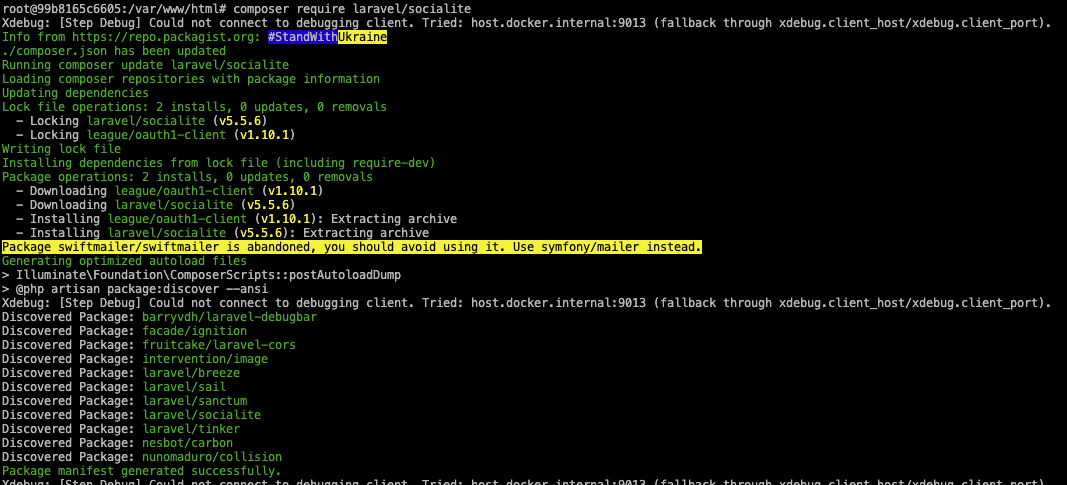
Socialiteのインストール
composerでインストールする
readouble.com
$ composer require laravel/socialite
設定ファイル
Socialiteを使用する前に、アプリケーションが使用するOAuthプロバイダの資格情報を追加する
Google Cloudで取得した認証情報を.envに記述し、それをservices.phpに設定する
GOOGLE_KEY=""
GOOGLE_SECRET=""
GOOGLE_REDIRECT_URI="http://localhost:8006/auth/google/callback"
<?php
'google' => [
        'client_id' => env('GOOGLE_KEY'),
        'client_secret' => env('GOOGLE_SECRET'),
        'redirect' => env('GOOGLE_REDIRECT_URI'),
      ],
usersテーブルにgoogle_idカラムを追加
$ php artisan make:migration add_google_id_to_users_table

<?php

use Illuminate\Database\Migrations\Migration;
use Illuminate\Database\Schema\Blueprint;
use Illuminate\Support\Facades\Schema;

class AddGoogleIdToUsersTable extends Migration
{
    /**
     * Run the migrations.
     *
     * @return void
     */
    public function up()
    {
        Schema::table('users', function (Blueprint $table) {
            $table->string("google_id")->nullable();
        });
    }

    /**
     * Reverse the migrations.
     *
     * @return void
     */
    public function down()
    {
        Schema::table('users', function (Blueprint $table) {
            $table->dropColumn('google_id');
        });
    }
}
Userモデルのホワイトリストにgoogle_idを追加

ルーティング設定
Googleログインボタン押下時の遷移先と、認証後のアプリ側のリダイレクト先を設定
<?php
//googleログインのルート
Route::get("auth/google", [LoginWithGoogleController::class,"redirectToGoogle",]);
Route::get("auth/google/callback", [LoginWithGoogleController::class,"googleCallback",]);
Controller作成
$ php artisan make:controller LoginWithGoogleController
<?php

namespace App\Http\Controllers;

use Illuminate\Http\Request;
use Laravel\Socialite\Facades\Socialite;
use App\Models\User;
use Illuminate\Support\Facades\Auth;
use Exception;

class LoginWithGoogleController extends Controller
{
    public function redirectToGoogle()
    {
        return Socialite::driver("google")->redirect();
    }

    // 追加
    public function googleCallback()
    {
        try {
            $user = Socialite::driver("google")->user();
            $finduser = User::where("google_id", $user->id)->first();

            if ($finduser) {
                Auth::login($finduser);
                return redirect()->intended("login");
            } else {
                $newUser = User::create([
                    "name" => $user->name,
                    "email" => $user->email,
                    "google_id" => $user->id,
                    "password" => encrypt("qwer1234"),
                ]);

                Auth::login($newUser);

                return redirect()->intended("login");
            }
        } catch (Exception $e) {
            \Log::error($e);
            throw $e->getMessage();
        }
    }
}
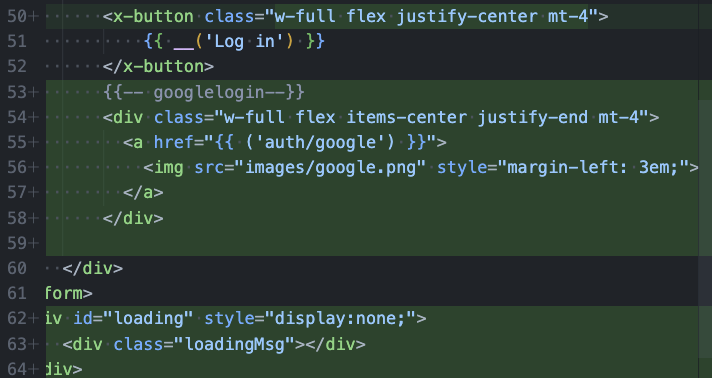
Googleログインボタンの設置
ロゴのダウンロード↓
Laravel Stripe決済実装
実行環境
- mysql5.7
- phpmyadmin
- Laravel Framework 8.83.26
- PHP Version 8.1.13
- Apache/2.4.54 (Debian)
Stripe
API型決済ライブラリ 手数料 3.6%
テストモードあり 会員登録後 APIキー発行
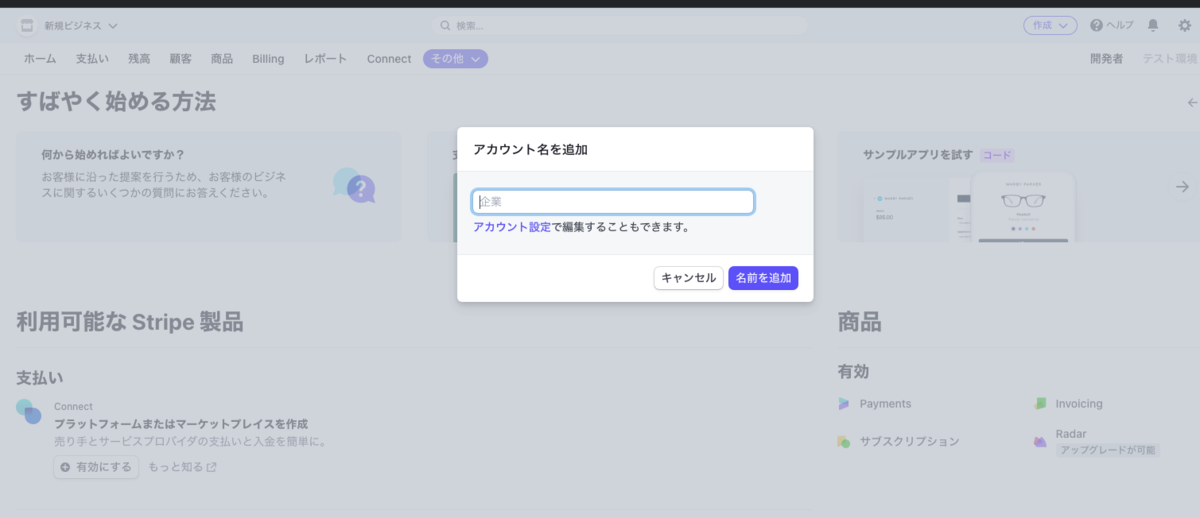
新規アカウント作成後
新規ビジネスからアカウント名を追加
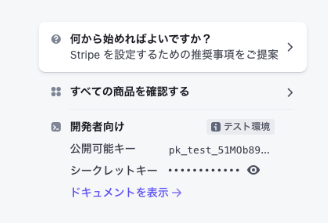
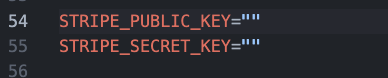
認証情報の準備
公開可能キー、シークレットキーを.envに追加
Stripeの使用方法
Laravel Casher (定期支払い向け)
Stripeが発行しているライブラリ
composerでインストール
$ composer require stripe/stripe-php
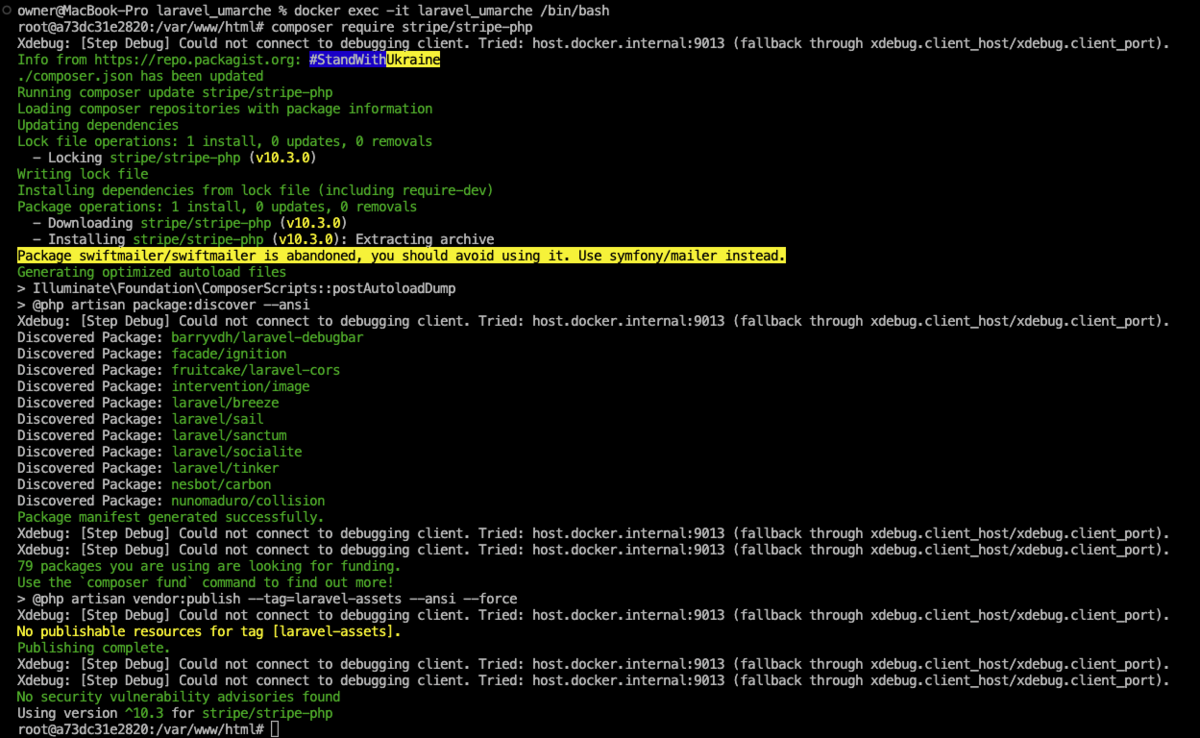
インストールできたらcomposer.jsonに追記される。

ルーティング設定
- 決済処理のルーティング
- 決済成功時、在庫を減らすルーティング
- 決済キャンセル時、在庫を戻すルーティング
<?php
//cartのルート
Route::prefix('cart')->
  middleware('auth:users')->group(function(){
    Route::post('add', [CartController::class, 'add'])->name('cart.add');
    Route::get('/', [CartController::class, 'index'])->name('cart.index');
    Route::post('delete/{item}', [CartController::class, 'delete'])->name('cart.delete');
    //決済処理のルート
    Route::get('checkout', [CartController::class, 'checkout'])->name('cart.checkout');
    //決済成功時、cartを削除するルート
    Route::get('success', [CartController::class, 'success'])->name('cart.success');
    //決済キャンセル時、cartを戻すルート
    Route::get('cancel', [CartController::class, 'cancel'])->name('cart.cancel');
});
Controller作成
doc参照
stripe.com
ログインユーザーを取得
ユーザーに紐付いた商品($products)を取得
foreachでカートに入っている商品($products)、現在の在庫数($quantity)を取得し、
もし、カート内の在庫($product->pivot->quantity)が現在の在庫数($quantity)より多かったらリダイレクトをかける
そうでなければ、商品情報をstripe側に受け取れる形にして渡す→stripe側で用意してるパラメータを使用
(カート内の商品が在庫数より少なければ購入できるようにする。)
※購入ボタンを押してstripe決済をしてから在庫を減らすと決済中に他のユーザーが在庫を変えた場合、決済完了後に減らす在庫がないなど発生するので、stripe決済の前に在庫を確認し、在庫を減らす処理を追加する。
envヘルパ関数でシークレットキーを取得し、支払い方法やカートに入った商品情報、決済成功時、キャンセル時のリダイレクト先などを$sessionへ格納
envヘルパ関数で公開可能キーの取得
<?php
public function checkout()
    {
        $user = User::findOrFail(Auth::id());
        $products = $user->products;
        //カートに入ってる商品
        $lineItems = [];
        foreach($products as $product){
            //現在の在庫数の取得
            $quantity ='';
            $quantity = Stock::where('product_id', $product->id)->sum('quantity');

            if($product->pivot->quantity > $quantity){
                return redirect()->route('user.cart.index');
            }else{
                $lineItem = [
                    'price_data' => [
                    'unit_amount' => $product->price,
                    'currency' => 'JPY',

                        'product_data' => [
                        'name' => $product->name,
                        'description' => $product->information,
                        ],
                    ],
                    'quantity' => $product->pivot->quantity,
                ];
                array_push($lineItems, $lineItem);
            }
        }
        //stripeに渡す前に在庫をへらす
        foreach($products as $product) {
            Stock::create([
            'product_id' => $product->id,
            'type' => \Constant::PRODUCT_LIST['reduce'],
            //カートの中の在庫数をへらす
            'quantity' => $product->pivot->quantity * -1
            ]);
        }

        \Stripe\Stripe::setApiKey(env('STRIPE_SECRET_KEY'));
        //支払い方法やカートに入った商品情報、リダイレクト先などを$sessionへ格納
        $session = \Stripe\Checkout\Session::create([
            //支払い方法
            'payment_method_types' => ['card'],
            'line_items' => [$lineItems],
            //1回払
            'mode' => 'payment',
            //支払い成功後のリダイレクト先
            'success_url' => route('user.cart.success'),
            'cancel_url' => route('user.cart.cancel'),
        ]);
        //公開可能キーの取得
        $publicKey = env('STRIPE_PUBLIC_KEY');
        //viewへ2つのキーが入った変数を渡す
        return view('user.checkout',compact('session', 'publicKey'));
    }
決済成功時
<?php
 public function success()
    {
        //決済成功時、cartを削除する
        Cart::where('user_id', Auth::id())->delete();
        return redirect()->route('user.items.index');
    }
決済キャンセル時
決済キャンセル時には決済前に在庫を減らしているので、それを戻す処理を追加する。
<?php
public function cancel()
    {
        //user情報取得
        $user = User::findOrFail(Auth::id());
        //stripe処理キャンセル時に在庫をふやす
        foreach($user->products as $product) {
            Stock::create([
            'product_id' => $product->id,
            'type' => \Constant::PRODUCT_LIST['add'],
            //カートの中の在庫数をふやす
            'quantity' => $product->pivot->quantity
            ]);
        }
        //キャンセル後カートへリダイレクト
        return redirect()->route('user.cart.index');
    }
view
- checkoutボタンの追加
- stripe.jsを読み込む
<div class="my-2">
  小計: {{ number_format($totalPrice)}}<span class="text-sm text-gray-700">円(税込)</span>
</div>
<div>
  <button onclick="location.href='{{ route('user.cart.checkout')}}'" class="flex ml-auto text-white bg-pink-500 border-0 py-2 px-6 focus:outline-none hover:bg-pink-600 rounded">購入する</button>
</div>
<p>決済ページへリダイレクトします。</p>
{{-- stripeの読み込み --}}
<script src="https://js.stripe.com/v3/"></script>
<script>
  // コントローラからpublicKey取得
const publicKey = '{{ $publicKey }}'
const stripe = Stripe(publicKey)
// 画面を読み込んだ瞬間実行
window.onload = function(){
  stripe.redirectToCheckout({
    // session->idで商品情報をstripeへ飛ばす
    sessionId:'{{ $session->id }}'}).then(function (result) {
    // エラーが発生した場合の遷移先
    window.location.href = '{{ route('user.cart.index') }}';
  });
}
</script>
動作確認
Laravel,Swiper
多機能・レスポンシブ対応・スライダーが作れるjavascriptライブラリ swiperjs.com
このようなスライダーを作成する

セットアップ
resources/js/swiper.jsを作成しjsを記入していく
app.jsは全ページで読み込まれるので、Swiper.jsとして個別で読み込む事で app.jsを軽くしつつ他ページ表示も遅くならない
中身は公式からコピペ
 // import Swiper JS
 import Swiper from 'swiper';
 // import Swiper styles
 import 'swiper/swiper-bundle.css';

// core version + navigation, pagination modules:
import SwiperCore, { Navigation, Pagination } from 'swiper/core';

// configure Swiper to use modules
SwiperCore.use([Navigation, Pagination]);

// init Swiper:
const swiper = new Swiper('.swiper-container', {
  // Optional parameters
  // direction: 'vertical',
  loop: true,

  // If we need pagination
  pagination: {
    el: '.swiper-pagination',
  },

  // Navigation arrows
  navigation: {
    nextEl: '.swiper-button-next',
    prevEl: '.swiper-button-prev',
  },

  // And if we need scrollbar
  scrollbar: {
    el: '.swiper-scrollbar',
  },
});
swiper.cssを作成し、app.cssでimportする。
.swiper-container {
  width: 600px;
  height: 300px;
}
@import 'micromodal';
@import 'swiper';
@tailwind base;
@tailwind components;
@tailwind utilities;
Laravel Mixに読み込ませる
mix.js('resources/js/app.js', 'public/js')
    .js('resources/js/swiper.js', 'public/js')
    .postCss('resources/css/app.css', 'public/css', [
        //
    ]);
ここまで設定したら、コンパイルする
→npm run dev
public/jsにswiper.jsができている。
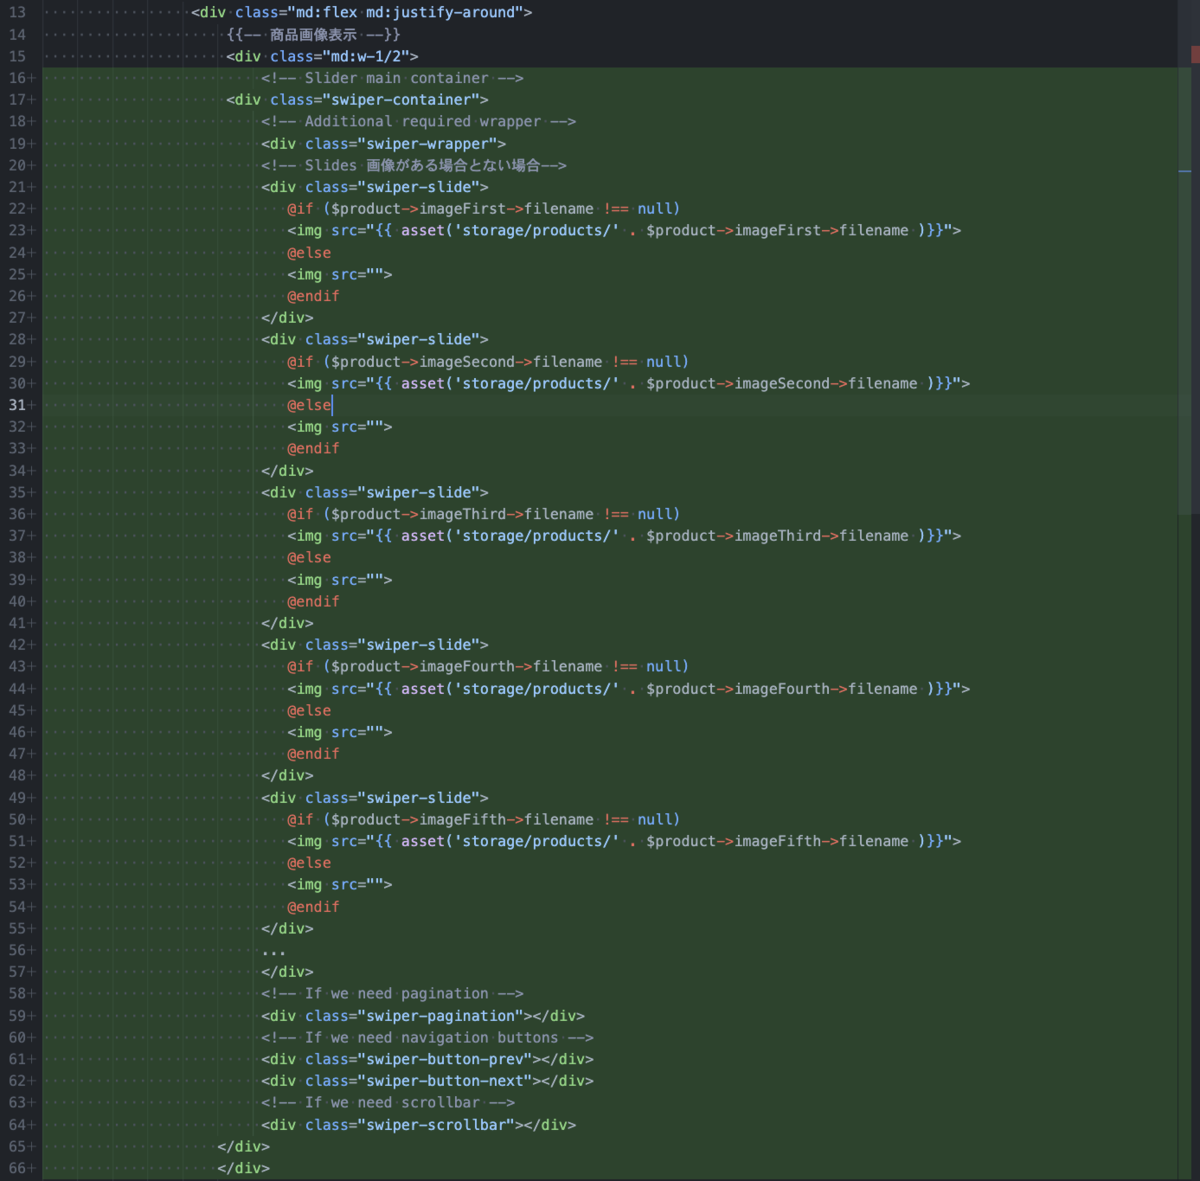
view側で読み込む
htmlの雛形は公式からコピペ
Getting Started With Swiper
{{-- sliderの読み込み --}}
  <script src="{{ mix('js/swiper.js') }}"> </script>
Laravel 多対多リレーション
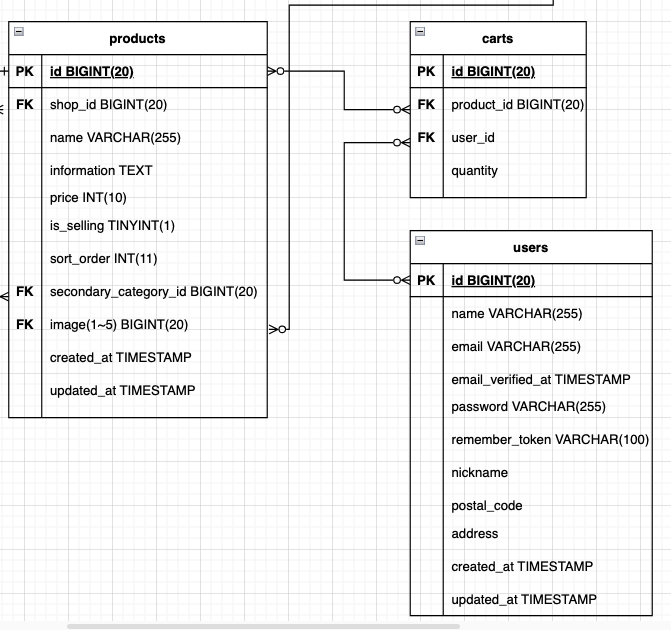
- 複数のuserが複数のproductをもてる→多対多
- 中間pivotテーブルとしてcartを作成し、それぞれ1対多の関係にする
cartsテーブル作成
root@f6999f3b8a5b:/var/www/html# php artisan make:model Cart -m
外部キー設定を記述
<?php
public function up()
    {
        Schema::create('carts', function (Blueprint $table) {
            $table->id();
            //ownerを削除したらshopも消える、shopが消えたらproductも消えるようにする→cascade
            $table->foreignId('user_id')->constrained()->onUpdate('cascade')->onDelete('cascade');
            $table->foreignId('product_id')->constrained()->onUpdate('cascade')->onDelete('cascade');
            $table->integer('quantity');
            $table->timestamps();
        });
    }
カートにいれるときにuser_id,product_id, quantityをまとめていれる設定
<?php
class Cart extends Model
{
    use HasFactory;

    protected $fillable = [
        'user_id',
        'product_id',
        'quantity'
    ];
リレーション設定
多対多の関係は、belongsToManyメソッドの結果を返すメソッドを作成して定義
中間テーブルのカラムを取得するとき、(今回の場合、userとproductが多対多)
pivot属性をつけることで、中間テーブルの値を取得できる。また、中間テーブルに追加の属性を取得したいとき、(今回はcartsテーブルのidとquantity)
モデル側でwithPivotの引数に必要な値を追記する。
<?php
use App\Models\User;

public function users()
    {
        return $this->belongsToMany(User::class,'carts')
        ->withPivot(['id', 'quantity']);
    }
<?php
use App\Models\Product;

public function products() {
      return $this->belongsToMany(Product::class, 'carts')
      ->withPivot(['id', 'quantity']);
    }
Laravel Faker Factory
- Faker ・・PHPライブラリ ダミーデータ生成
→Laravelには標準搭載
- Factory・・ダミーを量産する仕組み Laravel8からクラスベースに変更
日本語化対応
config/app.php→'faker_locale' => ‘ja_JP’, に変更
php artisan config:clear でキャッシュ削除
php artisan make:factory ProductFactory —model=Product
php artisan make:factory StockFactory —model=Stock
—model=Productで使用するモデルも紐付けて作成される

→UserFactoryというサンプルファイルはデフォルトではいってる
UserFactory
$model = User::class;でUserモデルを使い、definitionで定義する
$this->faker->name(),のようにfakerで用意されてるプロパティを使う
<?php

namespace Database\Factories;
use App\Models\User;
use Illuminate\Database\Eloquent\Factories\Factory;
use Illuminate\Support\Str;

class UserFactory extends Factory
{
    protected $model = User::class;

    public function definition()
    {
        return [
            'name' => $this->faker->name(),
            'email' => $this->faker->unique()->safeEmail(),
            'email_verified_at' => now(),
            'password' => '$2y$10$92IXUNpkjO0rOQ5byMi.Ye4oKoEa3Ro9llC/.og/at2.uheWG/igi', // password
            'remember_token' => Str::random(10),
        ];
    }
ProductFactory
-今回使うプロパティ
name
realText
numberBetween
'price' => $this->faker->numberBetween(10, 100000)
数字(指定した範囲)
<?php

namespace Database\Factories;
use Illuminate\Database\Eloquent\Factories\Factory;

class ProductFactory extends Factory
{
    public function definition()
    {
        return [
            //数値はSeeder側で定義した値にしないとエラーになる
            'name' => $this->faker->name,
            'information' => $this->faker->realText,
            'price' => $this->faker->numberBetween(10, 100000),
            'is_selling' => $this->faker->numberBetween(0,1),
            'sort_order' => $this->faker->randomNumber,
            'shop_id' => $this->faker->numberBetween(1,2),
            'secondary_category_id' => $this->faker->numberBetween(1,6),
            //imageSeederで定義した範囲でないとエラーになる
            'image1' => $this->faker->numberBetween(1,7),
            'image2' => $this->faker->numberBetween(1,7),
            'image3' => $this->faker->numberBetween(1,7),
            'image4' => $this->faker->numberBetween(1,7),
            'image5' => $this->faker->numberBetween(1,7),
        ];
    }
}
StockFactory
stockは外部キー制約でproduct_idをもっている
productfactoryで生成した内容と紐付ける
productfactoryから生成した順に登録される
<?php

namespace Database\Factories;

use App\Models\Product;
use Illuminate\Database\Eloquent\Factories\Factory;

class StockFactory extends Factory
{
    public function definition()
    {
        return [
            //stockは外部キー制約でproduct_idをもっている、productfactoryで生成した内容と紐付ける
            //productfactoryから生成した順に登録される
            'product_id' => Product::factory(),
            'type' => $this->faker->numberBetween(1,2),
            'quantity' => $this->faker->randomNumber,
        ];
    }
}
※factoryとはログにでないので注意

.gitignoreが反映されない場合
以下、2ディレクトリをgit管理対象にするため .gitignoreに記載したが反映されない。
/public/css
/public/js
※.gitignoreはそこから下のディレクトリにしか影響を及ぼせない。
キャッシュをクリアすることで解決
Gitは更新情報をリポジトリにキャッシュとして持っているので、管理対象外となっている
.gitignore ファイルに/public/css、/public/jsを管理対象に設定しても、キャッシュがあるせいで トラッキングされる。
下記コマンドでキャッシュを削除する必要がある。
最初に現在のワーキングツリーの内容をインデックスに追加してコミットする。
でないと、それ以降の作業で変更が失われる。
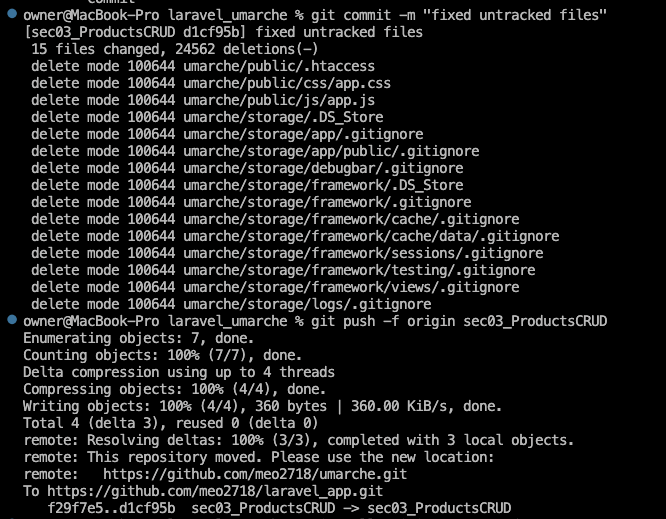
git add -A
git commit -m "Add:~~~~"
git rm -r --cached .
git add -A
git commint -m "fixed untracked files"

コミット後、pushしたらリモートの/public/css、/public/jsが削除されている。