Laravel Socialite OAuth認証の実装(Googleログイン)
実行環境
- mysql5.7
- phpmyadmin
- Laravel Framework 8.83.26
- PHP Version 8.1.13
- Apache/2.4.54 (Debian)
socialiteを使用し、OAuth認証を実装
OAuthとは
OAuth (オー オース) は、権限の認可(authorization)を行うためのプロトコル。
認可のためのプロトコルであり、認証で使うとセキュリティ上リスクがある。
※認証と認可の違い↓
dev.classmethod.jp
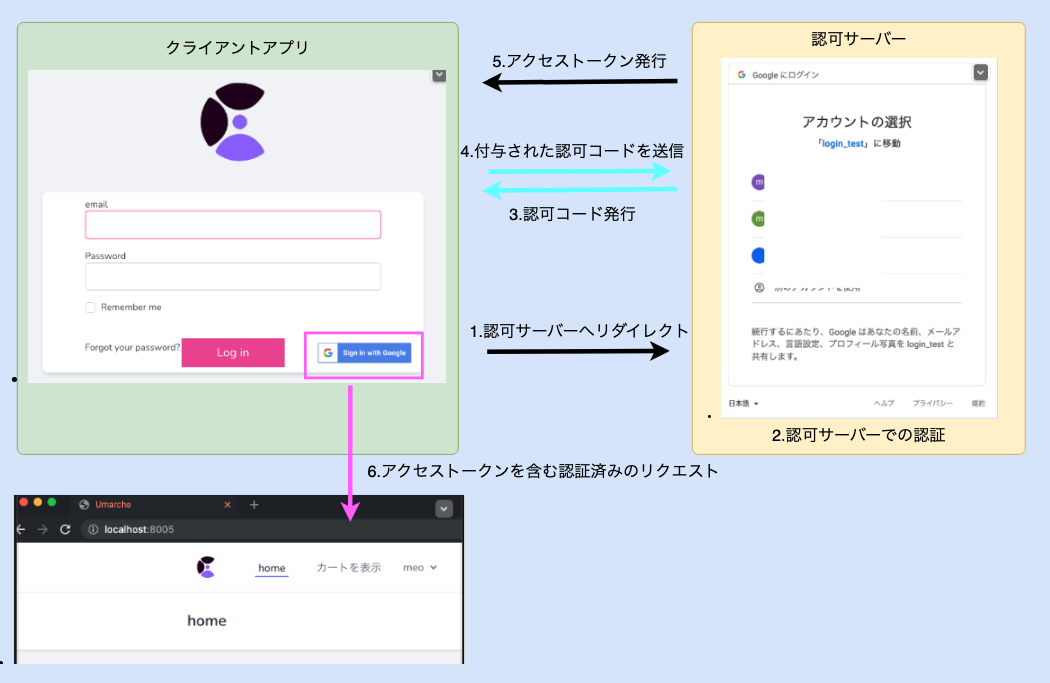
認証サーバーへリダイレクト
Googleと連携したい時に、クライアントから認証情報を付与して、Googleの認可サーバーへのリダイレクトさせる。
'client_id' => env('GOOGLE_KEY'),
'client_secret' => env('GOOGLE_SECRET'),
'redirect' => env('GOOGLE_REDIRECT_URI'),認可サーバーでの認証
ユーザーは認証サーバーに対してgoogleアカウントで認証を行い、クライアントアプリから求められているアクセスを許可する。認証コード発行
アクセスが許可されると、アクセストークンを発行するための認可コードを発行して、クライアントアプリへ再びリダイレクトされる。付与された認可コードを送信
リダイレクト時に付与された認証コードをクライアントアプリは認証サーバーに送信する。
APIキー発行手順
新規プロジェクト作成
Google Cloud Platformへログインをして、新しプロジェクトを作成する。 console.cloud.google.com
プロジェクト名を入力し作成

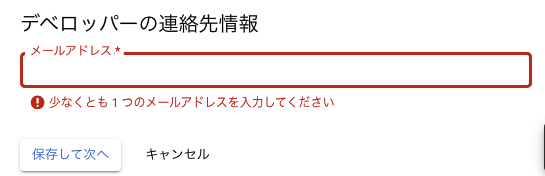
OAuth同意設定
外部ユーザーがログインするので外部を選択し作成。

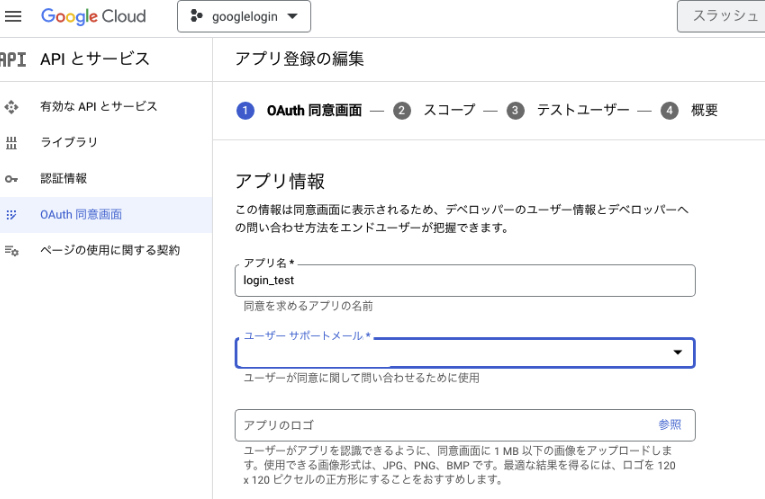
googleログイン ではスコープ・テストユーザー不要

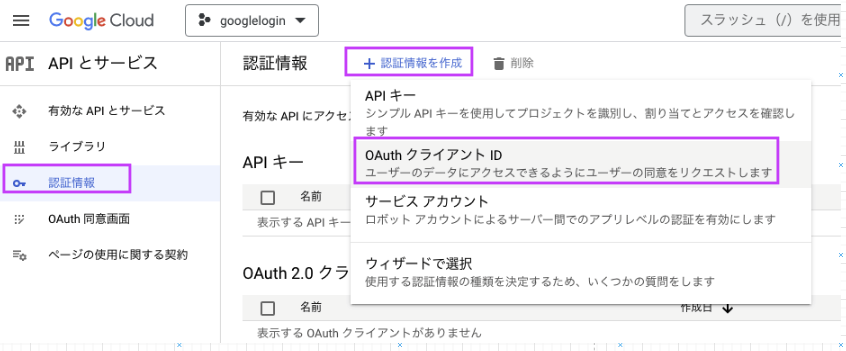
認証情報の発行
OAuth クライアントIDを選択
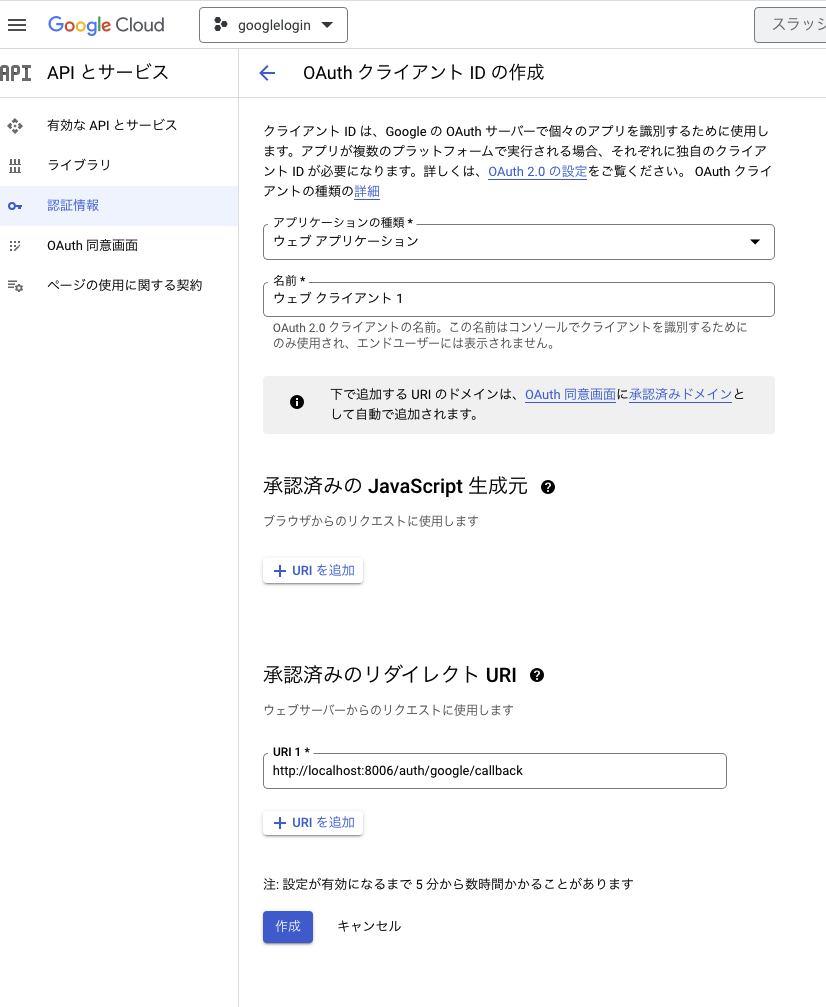
OAuth認証発行用事項入力
- 名前 ー 管理画面で識別するための名前なので任意の文字列でOK
- 承認済リダイレクトURL ー callback URLを入力。.envで設定したのと同じもの
APIキーの発行

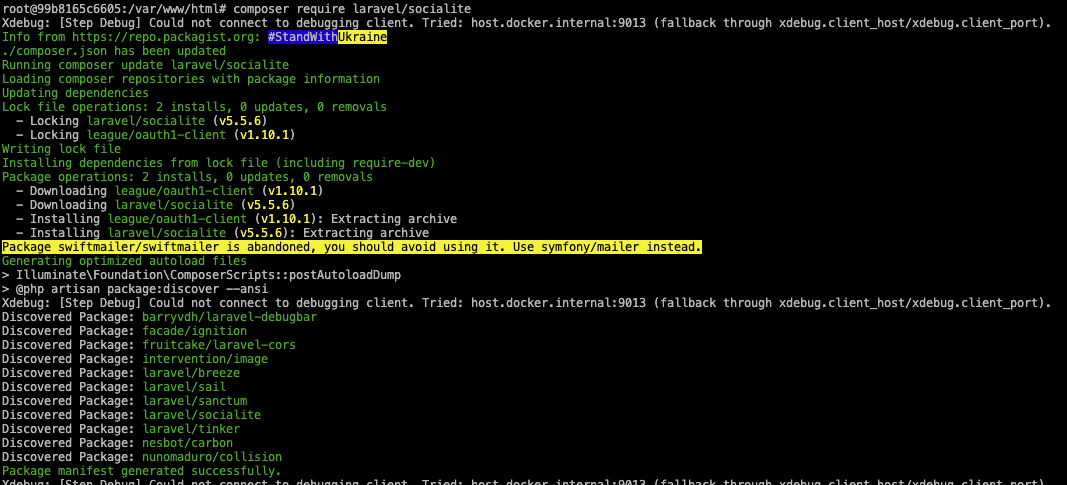
Socialiteのインストール
composerでインストールする
readouble.com
$ composer require laravel/socialite
設定ファイル
Socialiteを使用する前に、アプリケーションが使用するOAuthプロバイダの資格情報を追加する
Google Cloudで取得した認証情報を.envに記述し、それをservices.phpに設定する
GOOGLE_KEY=""
GOOGLE_SECRET=""
GOOGLE_REDIRECT_URI="http://localhost:8006/auth/google/callback"
<?php
'google' => [
        'client_id' => env('GOOGLE_KEY'),
        'client_secret' => env('GOOGLE_SECRET'),
        'redirect' => env('GOOGLE_REDIRECT_URI'),
      ],
usersテーブルにgoogle_idカラムを追加
$ php artisan make:migration add_google_id_to_users_table

<?php

use Illuminate\Database\Migrations\Migration;
use Illuminate\Database\Schema\Blueprint;
use Illuminate\Support\Facades\Schema;

class AddGoogleIdToUsersTable extends Migration
{
    /**
     * Run the migrations.
     *
     * @return void
     */
    public function up()
    {
        Schema::table('users', function (Blueprint $table) {
            $table->string("google_id")->nullable();
        });
    }

    /**
     * Reverse the migrations.
     *
     * @return void
     */
    public function down()
    {
        Schema::table('users', function (Blueprint $table) {
            $table->dropColumn('google_id');
        });
    }
}
Userモデルのホワイトリストにgoogle_idを追加

ルーティング設定
Googleログインボタン押下時の遷移先と、認証後のアプリ側のリダイレクト先を設定
<?php
//googleログインのルート
Route::get("auth/google", [LoginWithGoogleController::class,"redirectToGoogle",]);
Route::get("auth/google/callback", [LoginWithGoogleController::class,"googleCallback",]);
Controller作成
$ php artisan make:controller LoginWithGoogleController
<?php

namespace App\Http\Controllers;

use Illuminate\Http\Request;
use Laravel\Socialite\Facades\Socialite;
use App\Models\User;
use Illuminate\Support\Facades\Auth;
use Exception;

class LoginWithGoogleController extends Controller
{
    public function redirectToGoogle()
    {
        return Socialite::driver("google")->redirect();
    }

    // 追加
    public function googleCallback()
    {
        try {
            $user = Socialite::driver("google")->user();
            $finduser = User::where("google_id", $user->id)->first();

            if ($finduser) {
                Auth::login($finduser);
                return redirect()->intended("login");
            } else {
                $newUser = User::create([
                    "name" => $user->name,
                    "email" => $user->email,
                    "google_id" => $user->id,
                    "password" => encrypt("qwer1234"),
                ]);

                Auth::login($newUser);

                return redirect()->intended("login");
            }
        } catch (Exception $e) {
            \Log::error($e);
            throw $e->getMessage();
        }
    }
}
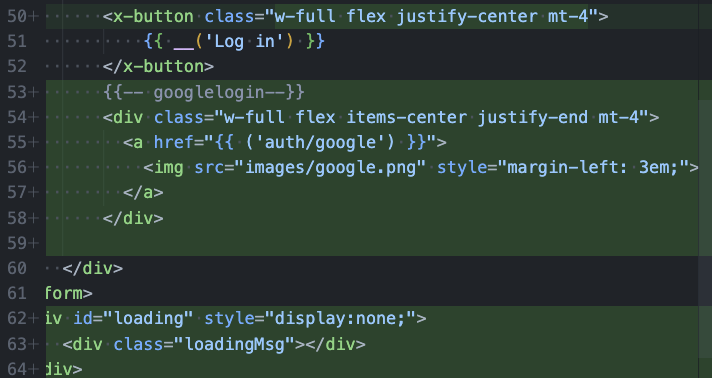
Googleログインボタンの設置
ロゴのダウンロード↓