Rspec実行時におけるエラー
エラー内容
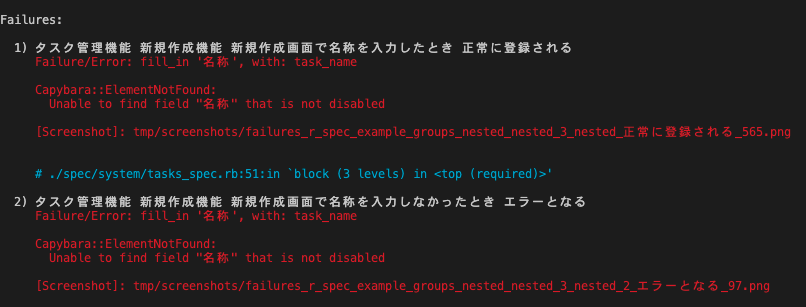
system specを用いて新規作成機能のコードをテストした際、
「Failure/Error: fill_in '名称', with: task_name」と
「Capybara::ElementNotFound: Unable to find field "タイトル"」エラーがでた。
エラー画面
「名称」は無効になっているので使用することはできないということから、テストコードに書かれているfieldの名称が異なっていることがわかる。
エラー解決手順
①chromeのデベロッパーツールを使用しfieldの名称を確かめる。
検証画像
 テストするタスク新規登録画面のフォーム入力のところにカーソルを近づけ調べるとfill_inのname属性と異なっていることがわかった。’名称’ではなく、'task[name]'であった。
fill_inについて
fill_inはフォーム入力を行うことができる「fill_in 'フォーム名' , with: フォームへ入力する文字列」と記述する。フォーム名にはname属性を記述される。
②name属性が違っていたので、テストコードを正しい記述へ変更する。
変更前のテストコード
describe '新規作成機能' do
    let(:login_user) { user_a }

    before do
      visit new_task_path
      fill_in '名称', with: task_name</span>
      click_button '登録する'
    end

    context '新規作成画面で名称を入力したとき' do
      let(:task_name) { '新規作成のテストを書く' }
      it '正常に登録される' do
        expect(page).to have_selector '.alert-success', text: '新規作成のテストを書く'
      end
    end

    context '新規作成画面で名称を入力しなかったとき' do
      let(:task_name) { '' }

      it 'エラーとなる' do
        within '#error_explanation' do
          expect(page).to have_content '名称を入力してください'</span>
        end
      end
    end
  end
変更後
describe '新規作成機能' do
    let(:login_user) { user_a }

    before do
      visit new_task_path
      fill_in 'task[name]', with: task_name
      click_button '登録する'
    end

    context '新規作成画面で名称を入力したとき' do
      let(:task_name) { '新規作成のテストを書く' }
      it '正常に登録される' do
        expect(page).to have_selector '.alert-success', text: '新規作成のテストを書く'
      end
    end

    context '新規作成画面で名称を入力しなかったとき' do
      let(:task_name) { '' }

      it 'エラーとなる' do
        within '#error_explanation' do
          expect(page).to have_content 'Nameを入力してください'
        end
      end
    end
  end
再度テストを実行し確認。
 無事にエラーが解決。
追記
bundle exec rspecについて
Rspecには表示を詳細に出力する--format documentationというものがある。上記画像のテストコードは-fdオプションで実行している。
-fdオプションの使い方
テスト実行時に以下のように指定
$ bundle exec rspec -fd
または、.rspecに下記の記述を追加する。
--format documentation
どのように表示が変わるか
通常時 bundle exec rspec では . で表示される。
$ bundle exec rspec spec/system/tasks_spec.rb
2021-04-06 04:42:19 WARN Selenium [DEPRECATION] Selenium::WebDriver::Chrome#driver_path= is deprecated. Use Selenium::WebDriver::Chrome::Service#driver_path= instead.
Capybara starting Puma...
* Version 3.12.6 , codename: Llamas in Pajamas
* Min threads: 0, max threads: 4
* Listening on tcp://127.0.0.1:61777
.....

Finished in 3.44 seconds (files took 1.82 seconds to load)
5 examples, 0 failures
-fdオプションを指定するとテストコードのcontextとitを表示してくれる。
$ bundle exec rspec -f d  spec/system/tasks_spec.rb
2021-04-06 04:07:10 WARN Selenium [DEPRECATION] Selenium::WebDriver::Chrome#driver_path= is deprecated. Use Selenium::WebDriver::Chrome::Service#driver_path= instead.

タスク管理機能
  一覧表示機能
    ユーザーAがログインしているとき
      behaves like ユーザーAが作成したタスクが表示される
Capybara starting Puma...
* Version 3.12.6 , codename: Llamas in Pajamas
* Min threads: 0, max threads: 4
* Listening on tcp://127.0.0.1:53137
        is expected to have text "最初のタスク"
    ユーザーBがログインしているとき
      ユーザーAが作成したタスクが表示されない
  詳細表示機能
    ユーザーAがログインしているとき
      behaves like ユーザーAが作成したタスクが表示される
        is expected to have text "最初のタスク"
  新規作成機能
    新規作成画面で名称を入力したとき
      正常に登録される
    新規作成画面で名称を入力しなかったとき
      エラーとなる

Finished in 3.52 seconds (files took 1.8 seconds to load)
5 examples, 0 failures
ActiveRecordエラー
ActiveRecord::StatementInvalid
SQLite3::SQLException: no such column: tasks.user_id:
error文に書いてあるとおりtasksテーブルにuser_idカラムがないというエラーである。 データベース上でUserとTaskを紐付ける際に発生した。 まず、ジェネレータでマイグレーションを作成し、
$rails g migration AddUserIdToTasks
マイグレーションファイルを以下のように編集しマイグレーションを実行した。
class AddUserIdToTasks < ActiveRecord::Migration[5.2]
  def up
    execute 'DELETE FROM tasks;'
    add_reference :tasks, :user, null: false, index: true
  end

  def down
    remove_reference :tasks, :user, index: true
  end
end

$bin/rails db:migrate
データベースの状態を確認したところ、マイグレーションを実行したにもかかわらず、データベースにuser_idカラムはつくられていないことがわかった。
#データベースへ接続
$rails db
=>SQLite version 3.28.0 2019-04-15 14:49:49
Enter ".help" for usage hints.
#データベースの一覧を確認
sqlite>.database
#テーブル一覧を取得
sqlite>.tables
ar_internal_metadata  tasks
schema_migrations     users
#テーブルの中のカラムを確認(今回はtasksテーブル)
sqlite> PRAGMA TABLE_INFO(tasks);
0|id|integer|1||1
1|name|varchar|1||0
2|description|text|0|NULL|0
3|created_at|datetime|1||0
4|updated_at|datetime|1||0
sqlite> .exit
結論
ジェネレータの書き方が間違っていた。マイグレーションファイルにchangeメソッドがなかった。書籍では、bin/rails g migration AddUserIdToTasksで実行しているが、 「rails g migration Addカラム名Toテーブル名 カラム名:カラムのデータ型」このように、カラム名とカラムのデータ型を追加したら Tasksテーブルにuser_idカラムを追加することができた。マイグレーションをやり直すために、最初に作成したファイルを削除する必要がある。
#まず、ステータスを確認する。
$rails db:migrate:status
 Status   Migration ID    Migration Name
--------------------------------------------------
   up     20210323195016  Create tasks
   up     20210329092418  Change tasks name not null
   up     20210329175420  Create users
   up     20210329190039  Add admin to users
  down    20210331174646  Add user id to tasks

#upの場合、「$bin/rails db:migrate:down VERSION=migration_file_id」を実行し、downにする。
#downは、まだデータベースへ反映されていないので、削除しても問題ない。削除を実行。
$rm db/migrate/20210331174646_add_user_id_to_tasks.rb

#削除できたかステータスを確認。
$rails db:migrate:status
 Status   Migration ID    Migration Name
--------------------------------------------------
   up     20210323195016  Create tasks
   up     20210329092418  Change tasks name not null
   up     20210329175420  Create users
   up     20210329190039  Add admin to users
削除が確認できたらマイグレーションを「rails g migration Addカラム名Toテーブル名 カラム名:カラムのデータ型」で作成。
$bin/rails g migration AddUserIdToTasks user_id:integer
Running via Spring preloader in process 65692
      invoke  active_record
      create    db/migrate/20210401072016_add_user_id_to_tasks.rb
マイグレーションファイルを以下のように編集し、マイグレーションを実行。 マイグレーションファイルでは、changeメソッドの中でテーブルが作成される。
class AddUserIdToTasks < ActiveRecord::Migration[5.2]
  def change
    add_column :tasks, :user_id, :integer
  end

  def up
    execute 'DELETE FROM tasks;'
    add_reference :tasks, :user, null: false, index: true
  end

  def down
    remove_reference :tasks, :user, index: true
  end
end

$bin/rails db:migrate
== 20210401072016 AddUserIdToTasks: migrating =================================
-- add_column(:tasks, :user_id, :integer)
   -> 0.0010s
== 20210401072016 AddUserIdToTasks: migrated (0.0011s) ========================

#ステータスを確認
$bin/rails db:migrate:status
 Status   Migration ID    Migration Name
--------------------------------------------------
   up     20210323195016  Create tasks
   up     20210329092418  Change tasks name not null
   up     20210329175420  Create users
   up     20210329190039  Add admin to users
   up     20210401072016  Add user id to tasks
user_idカラムが作成されているかデータベースを確認。
$rails db
SQLite version 3.28.0 2019-04-15 14:49:49
Enter ".help" for usage hints.

sqlite> .databases
sqlite> .tables
ar_internal_metadata  tasks
schema_migrations     users

sqlite> PRAGMA TABLE_INFO(tasks);
0|id|integer|1||1
1|name|varchar|1||0
2|description|text|0|NULL|0
3|created_at|datetime|1||0
4|updated_at|datetime|1||0
5|user_id|integer|0||0

sqlite> .exit
無事にuser_idカラムが作成され、解決。
error
-bash: wget: command not found
3-1-7Railsのエラーメッセージを日本語にする
$ wget https://raw.githubusercontent.com/svenfuchs/rails-i18n/master/rails/locale/ja.yml -P config/locales/
=> -bash: wget: command not found
wgetとはLinuxコマンドの1つであり、コマンドからDLする際に使われているが、Macではwgetはもともとインストールされていないので、 wgetコマンドをインストールする必要がある。
$ brew install wget
wgetをインストールし再度実行したところ解決。
Execjs::runtimeerror in tasks#index
3-3コントローラとビュー
resourcesメソッドでアクションに関するルーティングを一括設定し、localhost3000にアクセスしたときにタスクの一覧が表示されるようにする。
config/routes.rb
Rails.application.routes.draw do
  resources :tasks
  root to:'tasks#index'
end
ルーティングの設定を書き換え、bin/rails sを実行したところエラーになった。 調べたらExecjsはgemだということがわかり、Gemfileにgem 'execjs'を追加し、bundle installしても解決せず。また、 therubyracerをbundle installしてみたらエラーになった。 therubyracerはjavascriptの実行エンジンであるv8を使えるようにするgemであり、扱っているlibv8のバージョンが古いのと2017年にすでに終了していたのでインストールできなかった。
An error occurred while installing libv8 (3.16.14.19), and Bundler cannot continue.
Make sure that `gem install libv8 -v '3.16.14.19' --source 'https://rubygems.org/'` succeeds before bundling.
代わりに、therubyracerの後継であるmini_racerをbundle installしたら解決した。

Githubへのソースコードのあげ方
ローカルリポジトリの作成
ディレクトリを作成し、移動してからgit initでリポジトリとして初期化させる。
initすることで.gitが新規作成される。.gitは隠しフォルダなので「command」+「shift」+「.」で表示させる。
gitでエラーが出た場合.gitを削除して再度git initすることがある。
$ mkdir ディレクトリ名
$ cd ディレクトリ名
$ git init
originにリモートリポジトリのURLを登録する。
origin=Github(リモートリポジトリ)の事
git remote add origin リポジトリURLを打ち、originという名前でgithubのブランチを追加。
$ git remote add origin https://github.com/~~~~~.git
$ git remote -v
origin  https://github.com/~~~~~~.git (fetch)
origin  https://github.com/~~~~~~.git (push)
リポジトリとは
バージョン管理によって管理されたファイルやディレクトリの状態や変更履歴を保管するところをリポジトリと呼ぶ。
リポジトリの種類:
ユーザーの紐付け
GitHubのユーザー名とメールアドレスを登録する
git config --global user.name ユーザ名

git config --global user.email メールアドレス

#以下のコマンドを入力し登録できてるか確認
owner@ownernoMacBook-Pro scaffold_app % git config --list
credential.helper=osxkeychain
user.name=ユーザー名
user.email=メールアドレス
core.repositoryformatversion=0
core.filemode=true
core.bare=false
core.logallrefupdates=true
core.ignorecase=true
core.precomposeunicode=true
開発過程をリモートリポジトリへ登録する流れ

- ステージング(add): ワークツリー(実際に作業してるディレクトリ)で変更があるファイルをステージングエリアへ追加する
- コミット(commit): ステージングエリアからローカルリポジトリへ登録
- プッシュ(push): ローカルリポジトリに登録されたファイルをリモートリポジトリへ追加
$ git add -A
$ git commit -m 'コミットメッセージ'
#GitHubは2020年10月から、新規作成リポジトリのデフォルトブランチを「main」という名前に変えたので切り替える
$ git branch -M main
コミットメッセージ書き方
- fix:バグ修正
- hotfix:クリティカルなバグ修正
- add:新規(ファイル)機能追加
- update:機能修正(バグではない)
- change:仕様変更
- clean:整理(リファクタリング等)
- disable:無効化(コメントアウト等)
- remove:削除(ファイル)
- upgrade:バージョンアップ
- revert:変更取り消し
リモートリポジトリの作成
トップページからnewを選択

- Repository nameに任意のリポジトリ名を入力。
- Initialize this repository with:はリポジトリを初期化する時の設定。
- ローカルにあるソースコードを入れる場合、チェックは入れなくていい。

Create repositoryでリポジトリが作成される。
リモートリポジトリへpush!!
pushとはローカルリポジトリをgithubのリモートリポジトリへ反映すること。以下を実行する。
#以下のコマンドでローカルリポジトリの変更をリモートリポジトリへ反映
$ git push -u origin main
Enumerating objects: 2756, done.
Counting objects: 100% (2756/2756), done.
Delta compression using up to 8 threads
Compressing objects: 100% (1885/1885), done.
Writing objects: 100% (2756/2756), 78.97 MiB | 10.77 MiB/s, done.
Total 2756 (delta 804), reused 0 (delta 0)
remote: Resolving deltas: 100% (804/804), done.
remote: warning: See http://git.io/iEPt8g for more information.
remote: warning: File volumes/db/data/ibdata1 is 76.00 MB; this is larger than GitHub's recommended maximum file size of 50.00 MB
remote: warning: GH001: Large files detected. You may want to try Git Large File Storage - https://git-lfs.github.com.
To https://github.com/meo2718/crud_app_java.git
 * [new branch]      main -> main
Branch 'main' set up to track remote branch 'main' from 'origin'.
Ruby on Rails 環境構築
rbenvをインストール
rbenvを使ってrubyをインストールすることでrubyのバージョンを自由に切り替えることができ、バージョンアップも安全にできる。 また、複数のアプリケーションで異なったバージョンのrubyを使うこともできる。
rbenvのインストールは「Homebrew」で行う。そのためには、「Command Line Tools for Xcode」をインストールする必要がある。 ターミナルで以下のコマンドを入力
$ xcode-select --install
次にHomebrewをインストールする。 公式サイト https://brew.sh/index_ja からスクリプトをコピーし、ターミナルに貼り付けて実行する。
$ /bin/bash -c "$(curl -fsSL https://raw.githubusercontent.com/Homebrew/install/HEAD/install.sh)"
以下のコマンドを実行し、このように表示されればインストール完了。
$ brew doctor
Your system is ready to brew
Homebrewがインストールされたので、rbenvをインストールする。 次に.bash_profileにパス設定と初期化処理を追加。
$ brew install rbenv

$ echo 'export PATH="$HOME/.rbenv/bin:$PATH"' >> ~/.bash_profile
$ echo 'eval "$(rbenv init -)"' >> ~/.bash_profile
rubyのインストール
インストールしたrbenvを使ってrubyをインストールする。
$ rbenv install 2.5.1

#インストール(2~3分)が終わったら、2.5.1バージョンをシステム全体と作業ディレクトリに適応。
$ rbenv global 2.5.1
$ cd ~/***

#最後に正しくインストールされたか確認。
$ ruby -v
ruby 2.5.7p206 (2019-10-01 revision 67816) [x86_64-darwin19]
rbenvでrubyのバージョンを切り替える。
rbenvでインストールしてあるrubyのバージョンを確認する。
$ rbenv versions
  system
  2.5.1
* 2.5.7 (set by /Users/owner/.ruby-version)
  3.0.0

#インストールしたバージョンに変更する。
$ rbenv local 2.5.1

#変更できたか確認。
$ ruby -v
ruby 2.5.1p57 (2018-03-29 revision 63029) [x86_64-darwin19]
パッケージ管理ツール「Ruby Gems」のアップデート
$ gem update --system

#最新のバージョンがインストールされていたら以下のように表示される。
$ gem update --system
Latest version already installed. Done.

#インストールされているgemを確認する
$ gem list
Bundlerのインストール
Bundlerとはgemのバージョンを管理するツールである。 BundlerはRuby Gemsからインストールできる。
$ gem install bundler
Railsのインストール
BundlerがインストールできたらいよいよRails(ここではバージョン5.2.1)のインストールを行う。
$ gem install rails -v 5.2.1

#正しくインストールできてるか確認。
$ rails -v
Rails 5.2.1
Node.jsのインストール
Node.jsとは、javascriptをサーバーサイドで動かすための実行環境である。 Homebrewでインストールする。
$ brew install node
Railsアプリケーションの作成
- アプリケーションの新規作成は「rails バージョン new アプリケーション名」でできる。
- バージョンを指定せずに作成すると、最新のバージョンで作成される。
- サーバーはディレクトリへ移動していないと起動できない。
- サーバーの終了はctrl+c
$ rails _5.2.1_ new scaffold_app

#scaffold_appディレクトリへ移動
$ cd scaffold_app

#サーバーの起動
$ rails s
=> Booting Puma
=> Rails 5.2.4.5 application starting in development
=> Run `rails server -h` for more startup options
Puma starting in single mode...
* Version 3.12.6 (ruby 2.5.1-p57), codename: Llamas in Pajamas
* Min threads: 5, max threads: 5
* Environment: development
* Listening on tcp://localhost:3000
Use Ctrl-C to stop
「http://localhost:3000/」へアクセスし、以下の画像が表示されれば正常にサーバーの起動ができている。

ローカル変数とスコープ
変数とは
- オブジェクトを入れておく箱のようなもの
- 名前(変数名)がついた箱のなかにオブジェクトが入っている
#「name」という変数を定義しその中に「"コーヒー"」という文字列オブジェクトを代入
name="コーヒー"
#変数「name」を呼び出すと「コーヒー」が表示される
puts name
=>コーヒー
スコープとは
- スコープは変数の見える範囲のことであり、変数の種類によって範囲が異なる。
ローカル変数
- ローカル変数は定義したメソッドの中がスコープになる
使用できるスコープが他の変数よりも限られている。
#testメソッド内で変数nameを同じメソッド内で使っている
  def test
  name = "satou"
p name
end

test
=> satou

#testメソッド内で定義した変数nameはメソッドの外からは見えないので、メソッドの外からは使えない。
  def test
  name = "satou"
end

test
p name
=>Traceback (most recent call last):
test.rb:5:in `<main>': undefined local variable or method `name' for main:Object (NameError)
インスタンス変数
- ローカル変数より広いスコープを持ち、同じオブジェクトなら複数のメソッドをまたいで使用可能。
- 変数名の頭に@をつけて定義。インスタンス毎に値を持てる。
class Menu
   def order(name)
   puts "#{name}をください"
   @name = name
end
   def order2
   puts"#{@name}をもう1枚ください"
   end
end

menu = Menu.new
menu.order("ピザ")
menu.order2
=> ピザをください
   ピザをもう1枚ください
#解説
ローカル変数nameのときは定義したメソッドの中がスコープなので、別のメソッドからは見ることができなかったが、インスタンス変数@nameはorderメソッドとorder2メソッドの両方から見ることができる
クラス変数
- 変数名の頭に@@をつけて定義。クラス内で1つの値をもつ。
- スコープはクラスとそのインスタンス
class Menu
   def initialize(name)
    @@name = name
   end

   def name
     @@name
   end
end

menu1 = Menu.new("ピザ")
menu2 = Menu.new("パスタ")

puts menu1.name
puts menu2.name
=>パスタ
  パスタ
#解説
menu2 = Menu.new("パスタ")で@@nameにパスタを代入したら、クラス変数はクラス内で1つの値しか持てないので、どのインスタンスで呼び出してもパスタが表示される